Workshops and Activities in Japan Pt 1


During the 2026 cherry blossom season, I went to Japan with some members of my family!
In this blog post, I will detail some of the activities and workshops I did, as well as how to book, and who I recommend them to. These recommendations will continue in parts 2 and 3.
Keep an eye out for a future blog post about different sightseeing recommendations across Tokyo and Kyoto, including my personal favourite spots!
To start, I'll show off the seamless post I shared on my instagram, which covered most of the activities I participated in this year:

The first workshop I participated in was a part of my mother's day gift. My mum's birth stone is a pearl, so I wanted to take her to the PICOLABO pearl workshop in Okachimachi (between Ueno and Akihabara stations on the Yamanote Line).
At PICOLABO, you pay about £20 to book in for the activity in advance (through their website), but you will have an extra charge when picking your jewellery. Whilst there, you will then have extra charges based upon the jewellery options you pick from.
The PICOLABO workshop starts with learning about the Akoya pearls, which are the seawater pearls primarily found around Japan. The process of creating pearls is described and explained, and I definitely would not recommend this workshop for vegans. Even, I, myself, found it a bit startling to learn how pearls are made (a natural and manmade combination).
However, it was still fascinating to learn!
After the brief lesson, my mum and I were then to pick our own oysters. Inside would be our pearls! I was quite nervous, at first, because all I could think was... what if my oyster doesn't have a pearl? This thought lingered as my mum broke into her oyster first, and found the pearl sitting front and centre! Meanwhile, I had to dig around in my oyster to find mine.
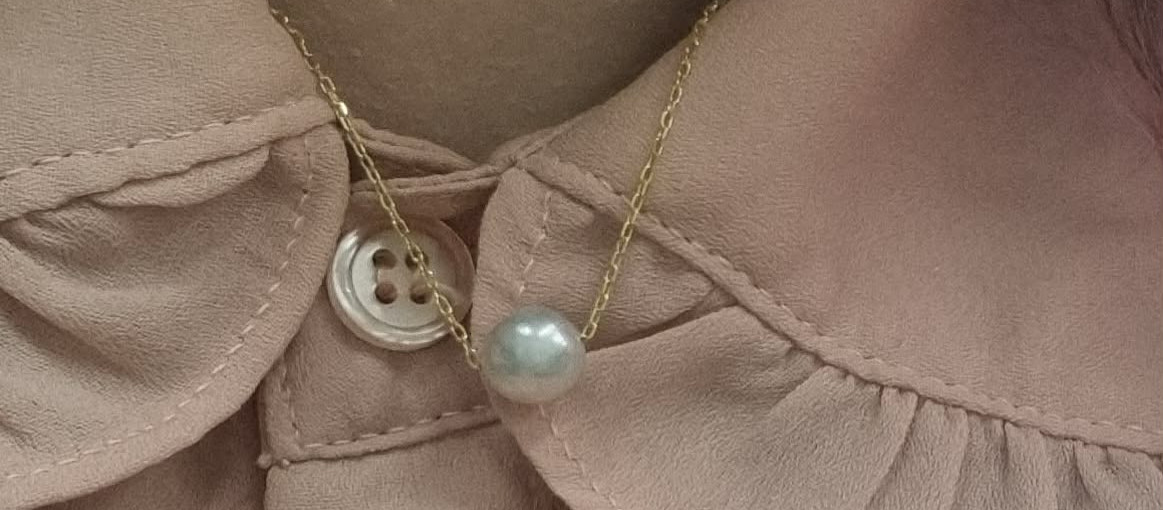
In the end, we both came out with two silvery-coloured pearls!

After retrieving our pearls, the next step was to pick our jewellery. This is the most expensive part of the workshop! PICOLABO is a jewellery shop, and Okachimachi is the Jewellery District of Tokyo. When finding your way from Okachimachi Station to PICOLABO you will pass many jewellery shops. And thus, the jewellery at PICOLABO is priced to match.
I chose a simple gold chain necklace for my pearl, whilst my mum chose a silver heart pendant and chain for hers.
Whilst waiting for our jewellery to be prepared, I was introduced to their Pearl Gachapon machine. For ¥5,000, you could try your luck to get a range of different pearl related items! This included jewellery sets and pearl fragments.
Some might say I'm addicted to gachapon, and some might be correct. I tried my hand and got 4 freshwater pearls from Mississippi. These pearls were pink tinted! And so, I was directed to buy more jewellery for my four new pearls (a successful upsell!)
I wish I could tell you the total I spent on jewellery at this workshop, but I can say it was both less than I was expecting for the overall haul, but perhaps more than I initially planned to spend. Since this was only at the start of my holiday, I decident to input my pin and forget the transaction ever happened.
WHAT: PICOLABO Pearl Workshop
WHERE: PICOLABO, Okachimachi, Tokyo
COST: Starting From ¥5,000 pp
HOW TO BOOK: directly with PICOLABO
RECOMMENDED FOR: Adults, Small Groups

The second workshop I had booked for my trip was the Edofurin Workshop! This was hosted by Shinohara Furin Honpo in Edogawa.

The Edofurin Workshop comes in two parts! The glassblowing, and the painting. You can book for both, or just the painting. I recommend doing both, as the hosts are amazing and make the experience great fun.
Edogawa is outside of Tokyo City Centre, whilst Shinohara Furin Honpo is a 14 minute walk from Shinozaki Station, or 16 minute walk from Mizue Station (both are on the Shinjuku Line). There are many vending machines on the walk, so if travelling on a hot day, be sure to stay hydrated!
When we first reached Shinohara Furin Honpo, we were directed to the reception building. Here we paid for the workshop, as we did not pay in advance (please always check cancellation and refund policies). The reception room is also full of many different furin examples! Gather inspiration for how you will paint your windchime by looking at the work of others.
Before moving on to the Glass Workshop room, we were given tips and advice on how to paint your windchime. This includes avoiding touching the base!
Edofurin are special windchimes, and they do not fully sand down the base. This is so that the most unique and authentic chime sound can be made. It does also mean that it can be sharp.
Other advice included remembering to work in layers! This will make more sense later...
At the Glass Workshop, you will encounter a heavy heat. In here are the huge furnaces used to melt the glass!
With the help of the professionals, you will be able to blow your own windchime. Our host didn't speak the most English, but he spoke enough to make the whole process easy and fun. His sense of humour shone through, too, and is why I will always recommend the glassblowing part of this workshop.
Whilst the glass cooled, we went up to the mezzanine floor, above the workshop, where we would paint our furin. Our table was ready with pots of primary-colour paints, and descriptions of mixing charts. I started mixing colours and ended up with a rainbow of pastel colours. I only intended to pick a few, but ended up wanting to use all of them (which then inspired by overall design).
Once we had our glass back, we could paint them! I enjoyed comparing the different shapes our furin took, as mine was a lot wider than my sister's.
The mezzanine floor was a lot quieter than the workshop floor, and provided a peaceful and quiet environment to paint. In the end, I painted my furin based upon wisteria... but in rainbow! I really like how wisteria shows a beautiful gradient of shades of purple, so I decided to do a brush-stroke gradient of rainbow colours!
To add further depth to my design, I painted over the colourful brushstrokes with white. When painting a windchime, you paint on the inside, so that your design is protected from the elements. If you painted the outside, the paint would slowly chip or fade away. So, you paint the inside! Which means you have to be intentional when you paint! The colours you want on top have to be painted first. And any background has to be painted last.
Doing something a lot more simple and laidback meant that I could fully appreciate the experience. Whilst I would have loved to have pushed myself to a furin covered in koi, I knew that I didn't want to stress out about how the result would turn out.
At the end, you return to the reception to have your edofurin strung up and packaged. There's also an opportunity to photograph your furin there (I recommend this, as it is best to
leave your windchime packaged until you return home).

And then you're done! With your very own, handmade, Japanese windchime.
WHAT: Edofurin Workshop
WHERE: Shinohara Furin Honpo, Edogawa, Tokyo
COST: ¥1,800 for painting only, ¥2,400 for glassblowing and painting
HOW TO BOOK: through RESERVA, check the website for updates
RECOMMENDED FOR: Teens and Older, Both Smaller and Larger (maybe about 8 people) Groups

And that is it for Part One!
In Part Two I will be going over the workshops I did in Kyoto, so keep an eye out for that blog post coming soon...


Comments